Saddle Installation - Step by Step
The following step-by-step process will showcase the UCMC methods of connecting side services to the new installed main line. Our steps include certified trained operator who are committed to make sure each connection is installed and individually tested. The added testing was our part to ensure quality.
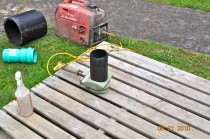
Below is an example of a 4" installation.

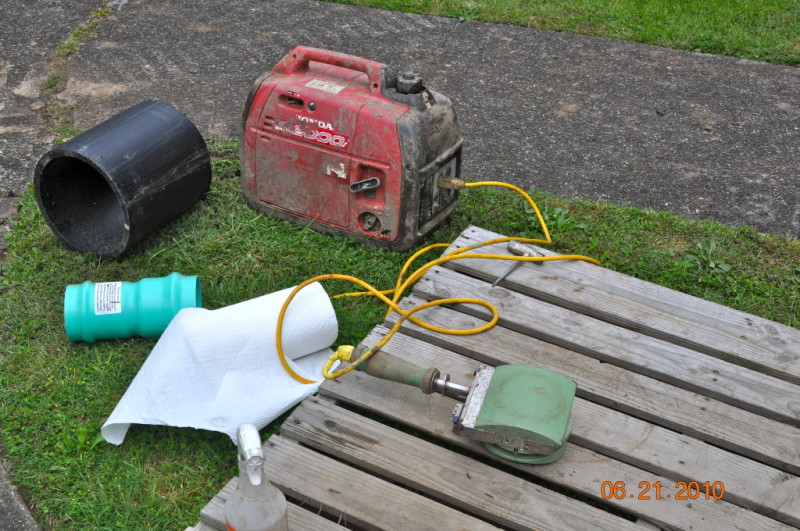
Step One - Prepare your tools
1. Portable generator (Recommend Honda 2000)
2. Extension cord - size length according to the depth of the hole
3. Paper Towels
4. Rubbing Alcohol
5. Paint Scraper and extra blades
6. Small Level
7. Chalk Pencil
8. Drill and custom made drill bit - available for sale by TTS Northwest
9. Heat Temperature Gun
10. Test Ball - size depending on size of Saddle
11. WD-40
12. Box Knife or any sharp knife
13. Bike Pump
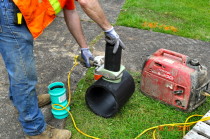
14. Saddle and coupler - sized to the main line
NOTE: Bevel the top of the saddle for easier coupler installation
15. McElroy Saddle Plate

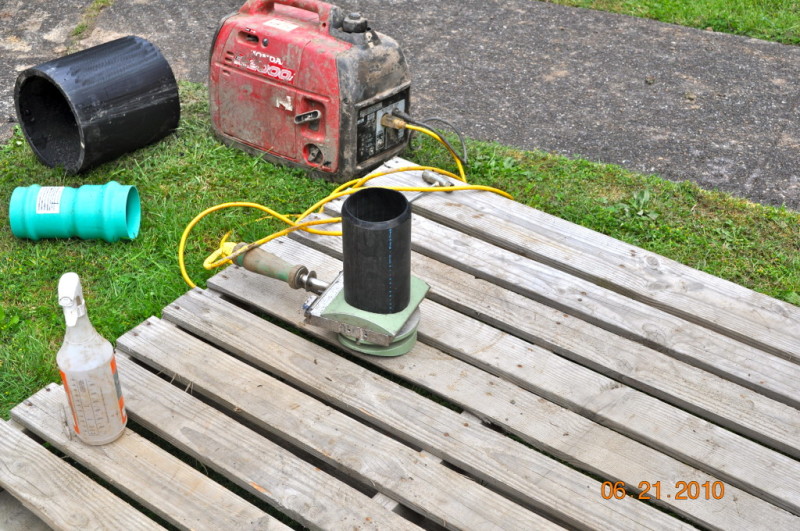
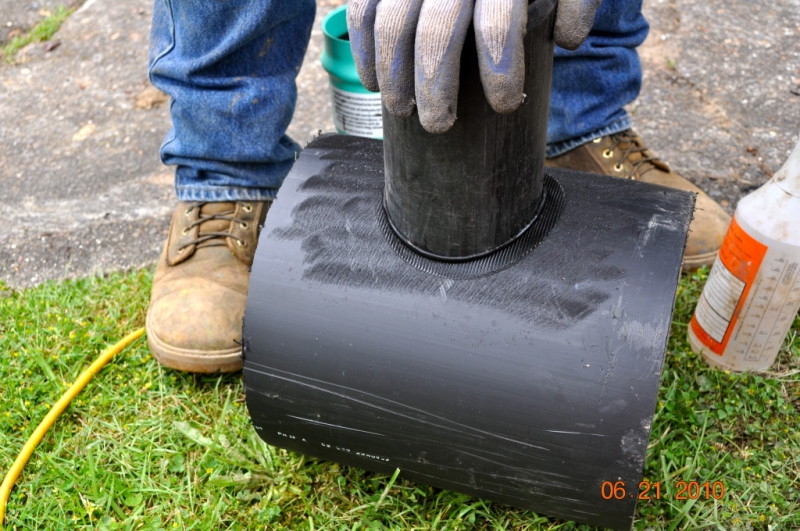
Step Two - Prepare the main line service
1. Using the Paint Scraper, scrape the surface of the area you are planning on installing the saddle. The purpose of this is to take out any imperfections on the pipe (i.e. deep groves from installation, flat surface) and make sure the pipe is a flat service.
2. Spray a generous amount of rubbing alcohol on the newly scraped surface and wipe down with the paper towels. This steps takes out any oils and dirt on the surface.
3. Use the saddle to determine the angle of connection from the main line to the side service. Every situation will be different depending on the depth of the hole but we recommend at least 25-90 degrees. Using the level, determine the angle based on recommended specs. Mark the top of the saddle on the main line for reference; you can use the paint scrapers blade or a chalk pencil.
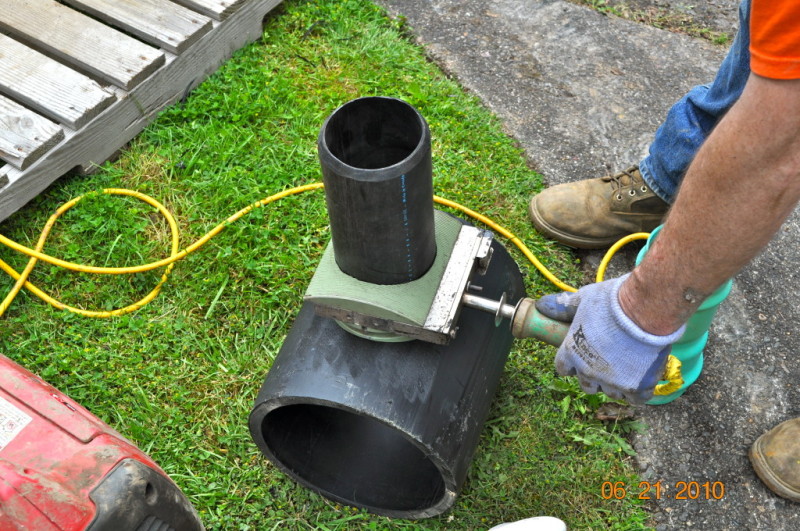
Step Three - Heating the Saddle
1. Make sure the Saddle Plate is 500 degrees.
2. Place Ssaddle on the Saddle Plate until a beed of .12 in. has formed around the edge.
3. See Step Four.
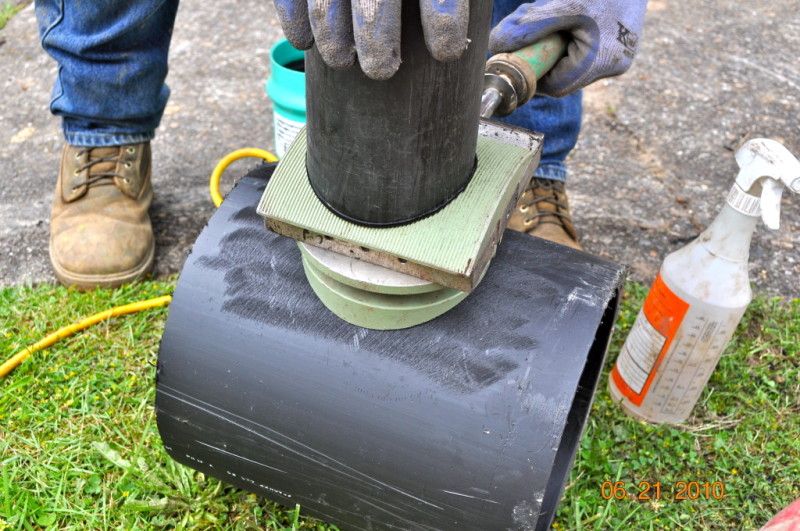
Step Four - Connecting the Saddle to the main line
1. Place the Heater Plate in the middle of the mark from your angled measurement. This will allow enough heated surface to work with.
2. At the same time, apply the semi-heated Saddle onto the plate at the same time. If the pipe is not completely round, you might have to heat the main line before adding the Saddle.
3. Once the main line is heated, and the Saddle has a .25 in. beed, remove the Saddle Plate, quickly place the Saddle onto the main line at the angle determined earlier, and firmly push down on the Saddle for two minutes. Push the beed in around the Saddle using a rounded edge (not your finger).
4. Let cool until 12590 degrees. If exposed to the sun, place a paper towel over to help cool. DO NOT put water on the newly heated area. Let cool naturally.
See photos from left to right. Click to view larger.


Step Five - Pressure Testing
1. Check to make sure inside is dry. Use a paper towel if needed.
2. Place test ball into the bottom of the Saddle. Make sure the test ball is tightly in the Saddle. Pump to 4psi. Hold for 10 seconds. If pressure does not go down over 10 seconds, the Saddle passes.
NOTE: If not completely dry, the air tester can slide up. DO NOT stand over the test ball.

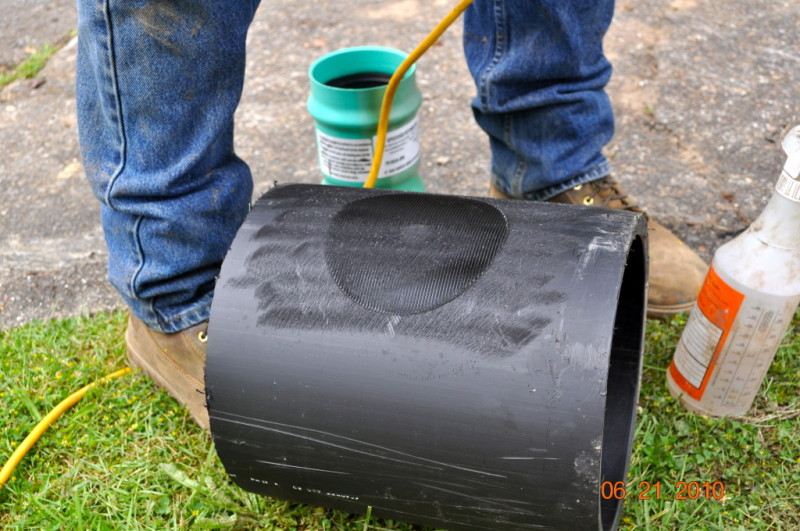
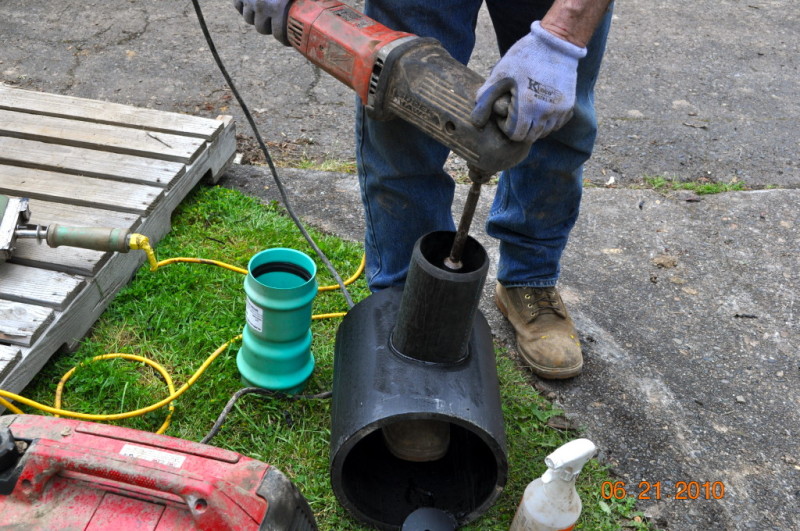
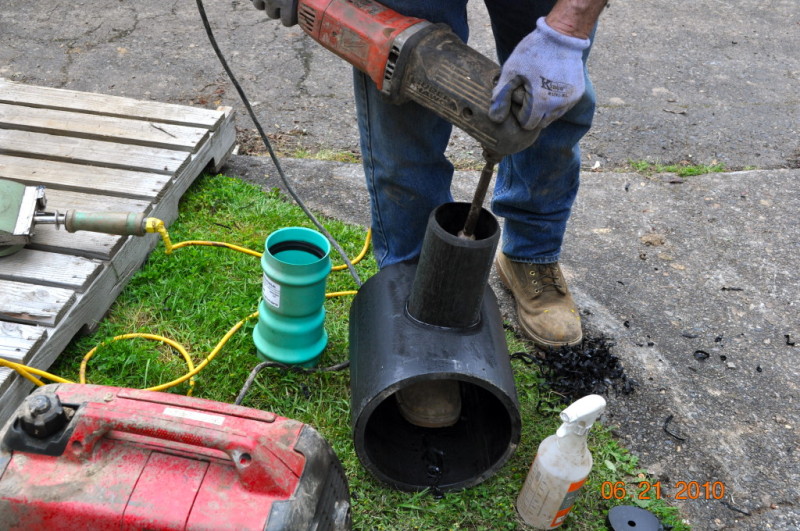
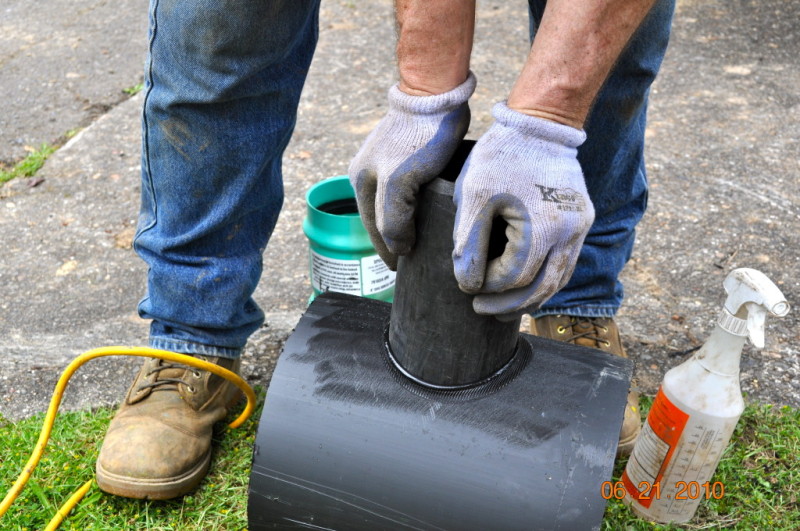
Step Five - Drilling
1. Using the heat gun, make sure the beed is 125 degrees.
2. Generously spray inside of the Saddle WD-40 and the drill bit. Place drill bit in the center of the Saddle and then tilt down slightly - this ensures a smoother transition for flow. Drill until you feel the drill break through the pipe. Make sure you grab the drilled piece if not in the drill bit.
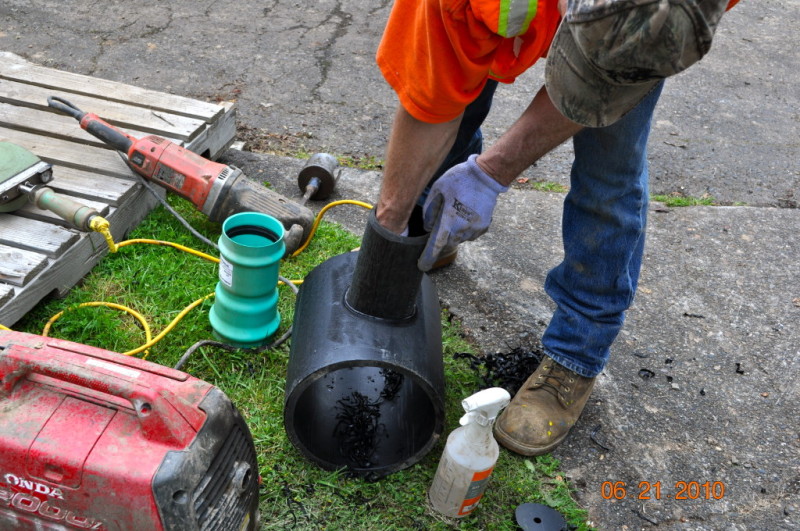
3. Place your hand around the edge for jagged edges. Use the knife to scrape the edges smooth.
 Feeling for jagged internal edges
Below is a collection of the above photos for larger viewing. Click on each one to view for more detail.